Slipways
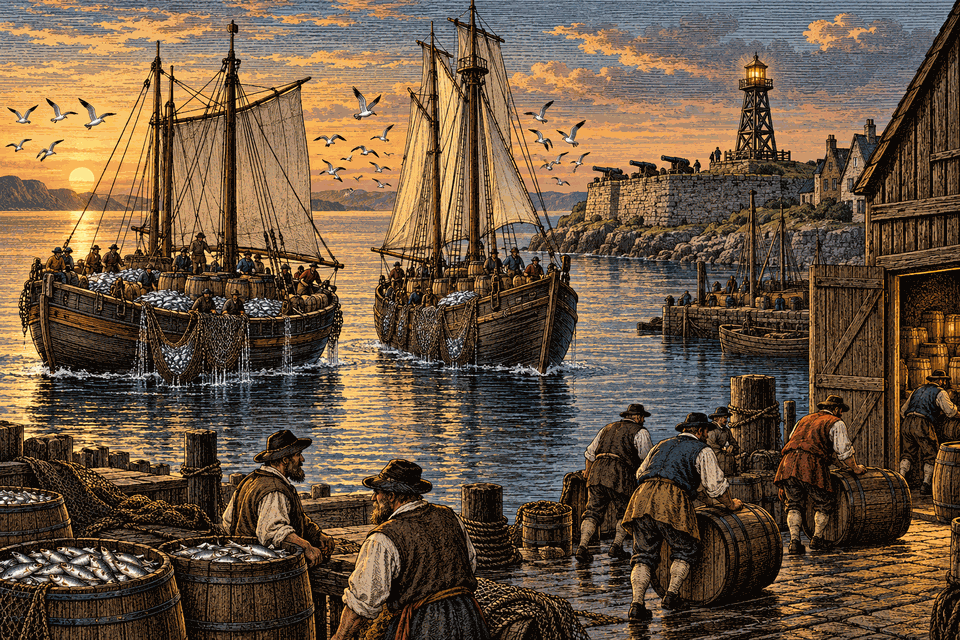
Shipyards now build more than one ship at a time, you choose how your shore is defended, and every battle has a replay you can share.
The Runner and the Slipways
RunnerLightSpecialistA knife of a hull under a press of canvas, built for nothing but speed. Carries next to nothing and gets there first.Attack 5Hull 20Cargo 50Speed 25
ShipyardBuildingBuilds ships. Higher levels unlock larger vessels.
 5
5 20
20 50
50 25
25The Runner is a new ship, built at Shipyard 8 with Sail Design 6 and Navigation 8. Speed 25, cargo 50: the fastest ship in the game and the last one Navigation unlocks. It carries very little and gets there first, so a quick trip to a trade post no longer needs a swarm of sloops. Expensive, in gold, pitch and bronze. Building your first one earns a title.
A Shipyard can now build more than one ship at a time: two at level 5, three at level 10, four at level 15. Members also now get one more at every shipyard they own. The Shipyard page shows how many ships are building, and the Shipyard card on the Port page shows how many the next level allows. Defences are still built one at a time. Shipyard levels 10 and up now cost Admiralty Brass and Grave Iron as well.
Defence Capacity
WatchtowerBuildingSets the shore's Defence Capacity and unlocks the heavier pieces. Sees incoming fleets earlier at higher levels.
PalisadeHeavyDefenceCheap wooden defence. Strength in numbers.Attack 5Hull 10
Cannon BatteryMediumDefenceA battery of light cannons covering the harbour. Built for sloops and brigantines.Attack 25Hull 20Powder 2/rd
Coastal FortressHeavyDefenceA stone star fortress. Guns behind walls that take a fleet to bring down.Attack 300Hull 500Powder 20/rd
 2/rd
2/rdYour Watchtower now gives your port a Defence Capacity, and every defence you build uses some of it. Defending your port is now a strategic choice: a port that expects sloop swarms builds differently from one that expects galleons.
- A Palisade uses 1 point, a Cannon Battery 2, a Heavy Cannon 3, a Mortar 4. The works below cost more.
- Ports already over their capacity keep everything, and can build again once under it.
- Break up removes a defence, frees its points at once, and returns materials at your Breaker's Yard's rate.
- Every defence is now a wall, a gun or a work. Attackers hit your walls first, then your guns, then your works, then the ships in your harbour.
- Each gun is built for a class of ship and fires at it first: Cannon Batteries at light ships, Heavy Cannons at medium ships, Mortars at heavy ships. Every defence card now shows what it is strong and weak against.
- Fortification research now gives every wall, gun and work 10% more hull per level.
The Works
Watch FiresHeavyDefenceFire baskets on the point. The gunners see the sails before the sails see the shore.The shore fires twice in the opening round.Attack 0Hull 300
Signal BeaconHeavyDefenceA lamp tower over the harbour. Every gun crew in port fights harder under it.Docked ships fight at +15% attack when defending.Attack 0Hull 300
Hot Shot FurnaceHeavyDefenceCannonballs heated in the furnace until they glow. Wooden hulls burn.Every attacker burns each round; fire resist helps.Attack 0Hull 250Powder 4/rd
Harbour ChainHeavyDefenceA massive chain across the harbour mouth. Boarding parties struggle to get past it, and ships that go down behind it are pulled back.Halves boarding against docked ships. Saves 10 lost hulls.Attack 0Hull 2000
Sea WallHeavyDefenceTakes the bombardment, and the raiders carry less away from behind it.Raiders take 5% less of the stores per wall, up to three.Attack 0Hull 1000
Works do not shoot; they change how the fight goes. Each needs a high Watchtower and a technology you may already have researched.
- Watch Fires: all your defences fire twice in the first round. Watchtower 8, Cartography 7.
- Signal Beacon: every ship docked at the port defends with 15% more attack. Watchtower 9, Seamanship 8.
- Hot Shot Furnace: every attacking ship takes fire damage each round. Fire resist reduces it. Watchtower 6, Gunnery 7.
- Harbour Chain: boarding parties have half their usual chance to capture your docked ships, and up to ten of your ships that would have sunk are saved. The battle report lists them. Fortification 5.
- Sea Wall: raiders take 5% less of your stores for each wall you have, up to three.
- The Coastal Fortress now needs Fortification 6, and the Mortar now costs Admiralty Brass.
The fortified NPC ports now defend themselves differently: the Pirate Stronghold has Watch Fires and heavy guns, the Company Factory hides behind walls and batteries, the Smugglers' Fortress has a Chain and a Beacon, the Haunted Citadel burns your ships, the Admiralty Station shells your biggest ones. Scout before you raid.
New art for the Cannon Battery, Heavy Cannon and Mortar. In the battle replay the guns now recoil when they fire, and the shore is drawn in three rows, walls, guns and works, with the harbour behind them.
The Breaker's Yard
Breaker's YardBuildingBreak up unwanted ships and recover a share of their materials. Higher levels recover more, and better.Needs Shipyard 2
Wreck IronTokenBent hull spikes and fittings stripped from Wreckers ships. Ranks prize ships and reforges Wreckers gear.
The yard now breaks up command ships and prize hulls too. A prize gives back the Wreck Iron put into it, and every named ship returns more the higher its rank. Ships at sea or on the Drydock's blocks stay where they are.
Catch
Fishing BoatLightFishingLight transport for hauling small loads.Catch: Base barrels of fish it brings home from a school.Attack 0Hull 10Cargo 100Speed 5 Catch 20
TrawlerLightFishingHeavy-netted fishing vessel for offshore trawling. Slow but hauls big.Catch: Base barrels of fish it brings home from a school.Attack 0Hull 30Cargo 400Speed 4 Catch 50
LonglinerLightFishingFast deep-water fishing ship with reinforced hull.Catch: Base barrels of fish it brings home from a school.Attack 5Hull 50Cargo 600Speed 7 Catch 80
WhalerMediumFishingEndgame harvester. Tough enough to survive what the deep throws at you.Catch: Base barrels of fish it brings home from a school.Attack 25Hull 100Cargo 1000Speed 5 Catch 120
Leviathan HunterMediumBlueprintsepicThe Accord's finest. Built to chase the great schools and survive what guards them.Doubles the chance of a bumper haul.Catch: Base barrels of fish it brings home from a school.Attack 40Hull 150Cargo 1500Speed 8 Catch 160
 Catch 20
Every fishing ship now has a Catch stat: the base number of barrels it brings home from a school. Fishing Boat 20, Trawler 50, Longliner 80, Whaler 120, Leviathan Hunter 160. The school, Trawling research and rations all scale it, and cargo caps it. The nets are never the same twice: a haul lands a little above or below, and now and then comes up heavy. A bigger fishing ship now brings home more fish, and the card and tooltip say how much.
Scouting and Fishing Missions
CartographyResearchImproves scouting reports. See more of your enemies. Levels 3, 6, 9 and 12 each allow one more scouting mission at a time.Navigator's Guild 1
Scout SloopLightSpecialistFast reconnaissance vessel. Reveals enemy port details.Attack 0Hull 5Cargo 30Speed 20
FisheriesResearchEach level gives your fishing fleets a better chance of bringing up Ambergris.Navigator's Guild 3
AmbergrisMaterialA waxy grey lump that comes up in the nets once in a hundred hauls. Worth more than the boat that found it. Fisheries wants it.
Scouting and fishing no longer have to wait for a fleet slot.
- Cartography levels 3, 6, 9 and 12 each allow one more scouting mission at a time, on top of your fleet slots.
- Fisheries is a new technology at Navigator's Guild 3. Levels 3, 6, 9 and 12 each allow one more fishing mission at a time.
- Every Fisheries level gives your fishing fleets a better chance of bringing up Ambergris, a rare material that every Fisheries level from 6 needs. The most dangerous grounds give the best odds.
- The Active Missions panel shows each kind of slot, and each mission's bar takes its own colour: blue for scouting, red for raids, gold for trade, green for deploy, purple for colonising, teal for fishing. The dispatch modal greys out missions with no slot free.
Battle Replays
FrigateMediumCombatFast, well-armed warship. The hunter of the seas.Attack 150Hull 100Cargo 80Speed 7Powder 16/rd
GalleonHeavyCombatMassive warship with devastating broadside. Requires steel reinforcement.Attack 400Hull 300Cargo 200Speed 4Powder 30/rd
Every battle now has a replay page you can share, in or out of the game. Press the link button on any battle report to copy its address; anyone who opens it watches the fight the way you did, ships, guns and all, and a card with the outcome shows wherever you paste it. The Ocean card on the Overview shows the latest fights in your ocean as they happen, and Watch on any of them opens the replay.
Every replay link you share carries your referral code. Anyone who joins from it counts as your recruit, so share them with your friends.
The Doubloon Exchange
DoubloonsTokenGold coins earned from alliance raids. Spend at the Corsair's Bazaar.
Colony ShipMediumSpecialistEstablishes a new port on an unoccupied island. Consumed on use.Attack 0Hull 100Cargo 1000Speed 2
Convoy FlagshipHeavyBlueprintsepicThe ultimate logistics vessel. Coordinates and protects an entire supply convoy.Increases cargo capacity of all ships in fleet by 20%.Attack 0Hull 400Cargo 10000Speed 3
A new shop for your doubloons at Store, Doubloon Exchange. The counter changes every Monday. The Corsair has new stock too, and he still only comes at the weekend.
Achievements
Achievements are rebuilt around the whole game, at Achievements (the laurel in the header).
- Thirteen categories: Raiding, Defence, Exploration, Port and Industry, Shipbuilding, Fishing, The Galley, Hauling and Trade, Quests and Factions, Campaigns, Alliance, Hunts and Collections. Open one to see everything in it and how far along you are.
- Most achievements are ladders: 1, 10, 50, 250 raids won, with the next rung and your progress shown.
- Every achievement pays points. Points show on your profile and on the rankings.
- Finish a category and it pays a new title: Sea Wolf, Bulwark, Wayfinder, Master Builder, Master Shipwright, Old Salt, Ship's Cook, Trade Prince, Renowned, Deep Runner, Commodore, Bounty Lord, Curator.
- Every title from before is still there to earn, and the ones you hold stay yours. Each category has a secret or two.
- Unlocks show as a card at the bottom of the screen, and in your inbox.
Other Improvements
TimberResourceHarvested from island forests. Used in nearly all construction.
NavigationResearchUnlocks advanced ship classes. Required for frigates, galleons, and capital ships.Navigator's Guild 1
- In Progress replaces the Build Queue and Research cards on the Overview: one card with every job on it. Each bar is coloured by what it is: brown for buildings, blue for ships, grey for defences, green for research.
- The Port page now shows the same bars at the top, so ship, defence and research progress is visible without leaving your port.
- Exploration on the Overview says whether today's double-loot scout is still available, shows the nearest unexplored water with a Chart next button, and names the best bonus tile you have found that nobody has settled, with a Colonise button.
- Live reports show the latest four battles in your ocean, with Show more for the rest.
- The Navigator's Guild and Shipyard cards say what the next level unlocks, and the Watchtower card shows your Defence Capacity.
- When you dispatch a fleet or a quest, the ship list is grouped by type. Each group folds away and stays folded.
- Each alliance raid tier can be won once a day. A failed attempt does not count, so a wall can be tried again.
Two hulls on the blocks and the shore is yours to arm.